
How to Frame a Photo in a Cinematic Aspect Ratio
A phone photo is usually 4:3 or 16:9. A film still is often wider, and that change of frame is what makes the same cabin, hills, and sky feel like a movie. ROCKIMG’s free Cinematic Aspect tool does the job in the browser: choose 2.39:1, 2.00:1, 1.85:1, 16:9, or 4:3, then keep the whole picture with bars or trim the edges with a crop. Nothing is uploaded.
Published on: October 11, 2026
Frame your own photo in a film ratio, free, in the browser.
Open Cinematic AspectWhy a cinematic aspect ratio matters
The frame decides what the eye treats as the subject. A wider ratio drops extra sky and foreground and sends attention across the horizon.
A trailer still feels wider than a phone snapshot of the same place once the extra sky and floor are gone. Common jobs:
- Film stills and thumbnails that should read as a widescreen frame at a glance.
- Title cards and end cards where black bars are part of the design.
- YouTube and presentation covers that have to match 16:9.
- Retro frames that want the taller 4:3 television shape.
- Private edits. Cinematic Aspect runs locally. Photos are not sent to a server. The file limit is 20MB.
How 2.39:1, 2:1, 1.85:1, 16:9, and 4:3 differ
Wider ratios keep a shorter slice of the photo. On this tool, 2.39:1 is the widest and 4:3 is the tallest.
The five buttons match frames you already see in theaters, streaming apps, and on a television. The number is width divided by height. 2.39:1 means the picture is 2.39 times as wide as it is tall.
2.39:1 scope
This is modern anamorphic widescreen, the scope frame used for epics, deserts, skylines, and a lot of trailer stills. Older write-ups say 2.35:1 or 2.40:1. Those names belong to the same family. The current theatrical figure is 2.39:1, and that is the button on the tool.
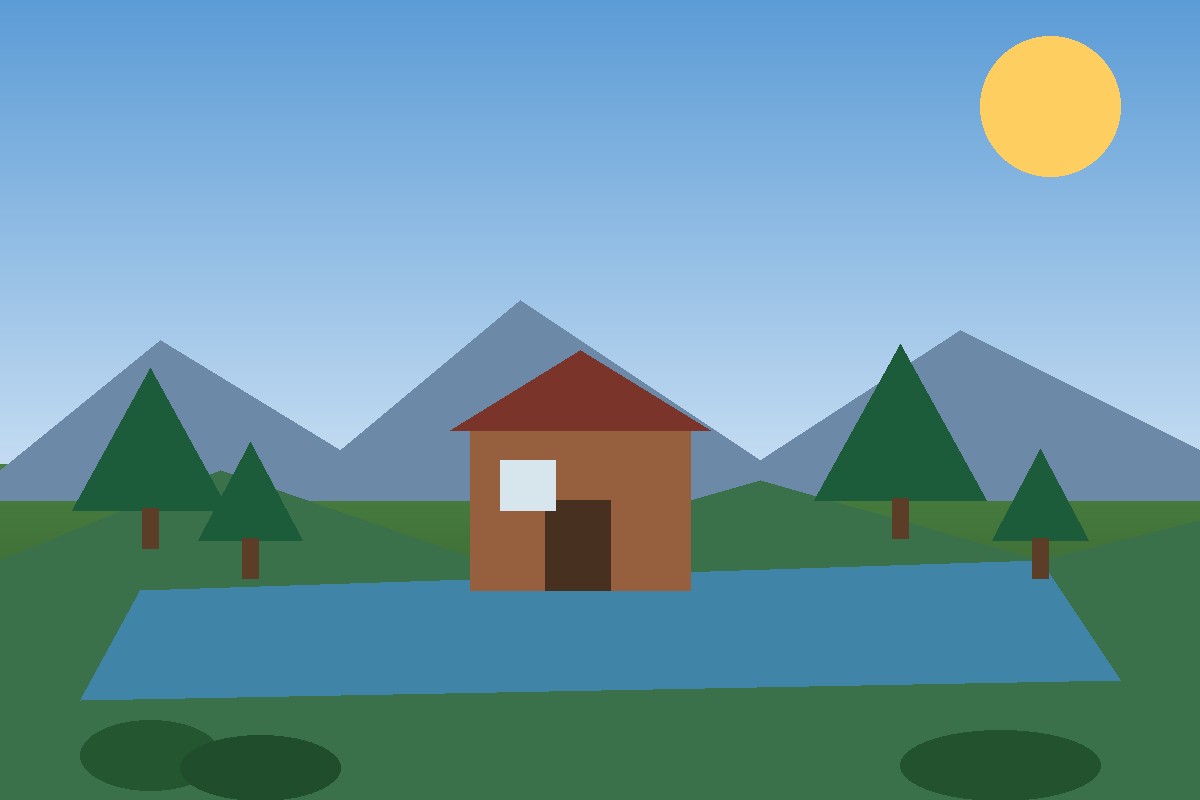
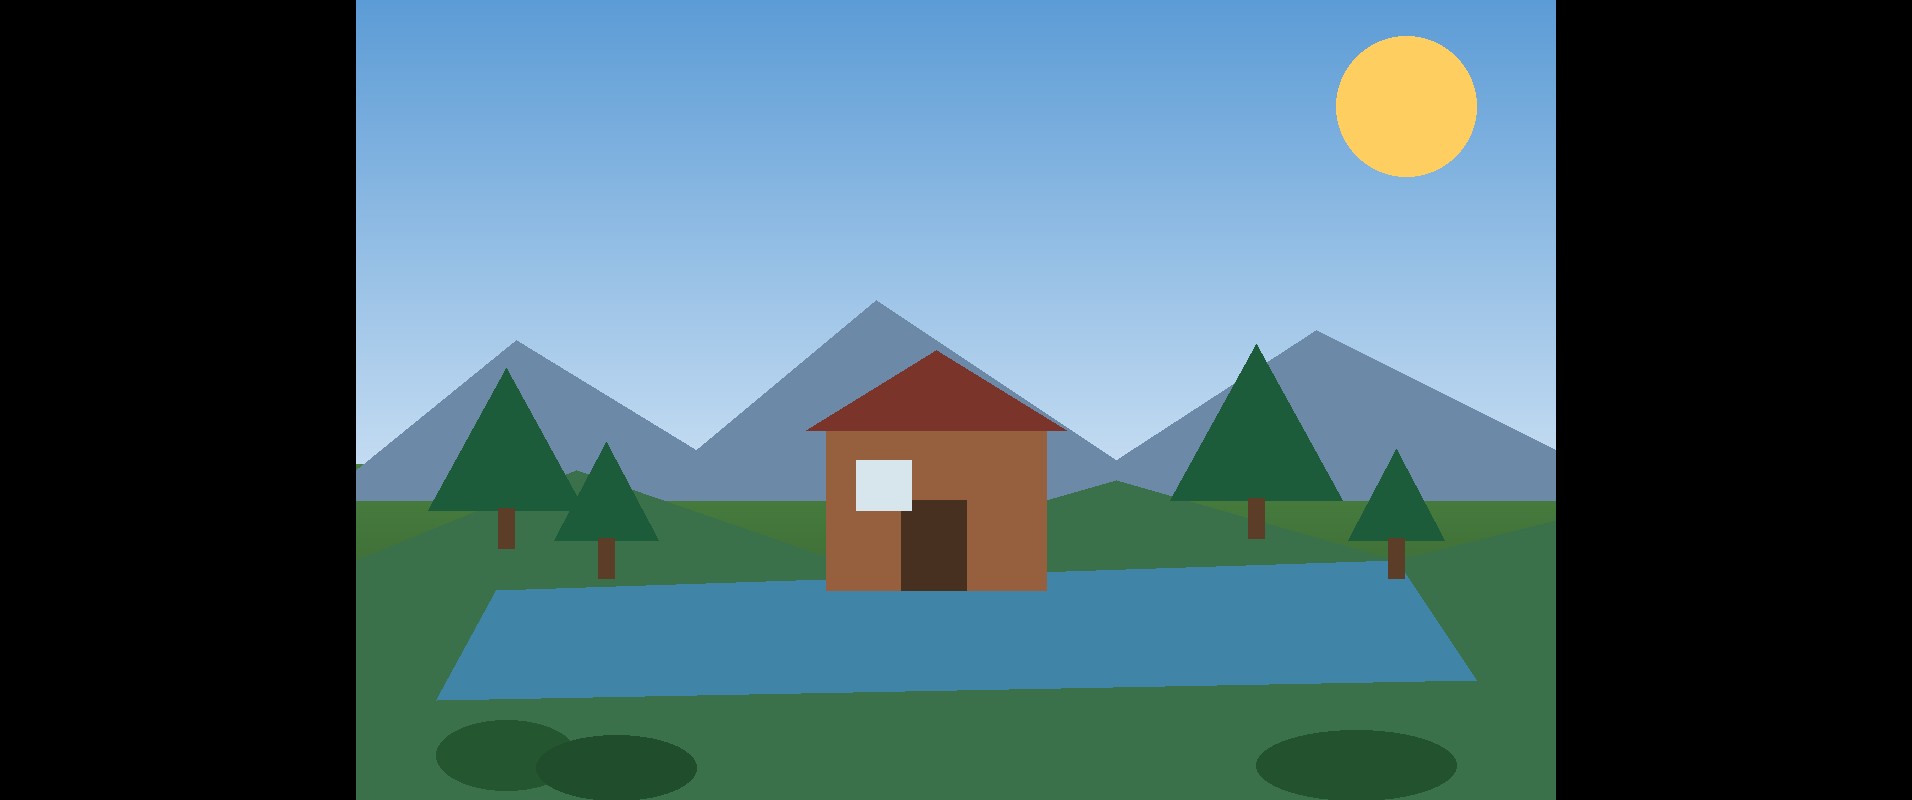
On a typical 3:2 or 4:3 photo, a centered crop removes a thick band above and below the subject. Bars mode keeps the original whole, grows the canvas sideways, and fills the new sides with black or a color you pick. The sample above goes from 1200×800 to 1912×800.
2.00:1
Twice as wide as it is tall. Many streaming dramas use 2:1 because it sits between theatrical scope and a television frame. Faces keep more room than they do at 2.39, and the picture still feels wider than a phone screenshot.
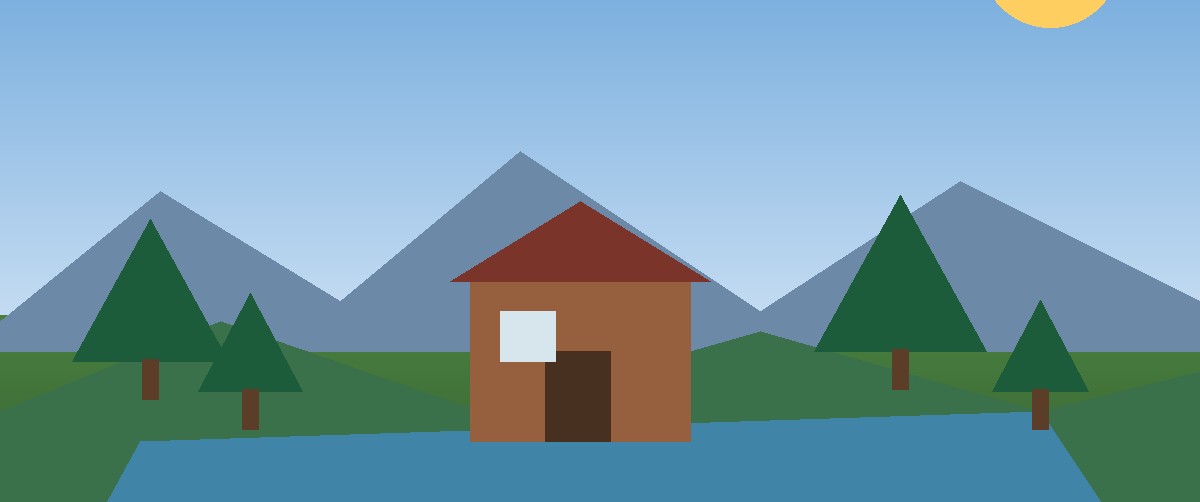
Pick 2.00:1 for key art, episode stills, and any frame that has to feel cinematic on a laptop without shaving the top of someone’s head. From the 1200×800 sample, a centered crop is 1200×600.
1.85:1 flat
This is the standard American theatrical widescreen, often called “flat” beside anamorphic scope. Comedies, dialogue scenes, and a large share of multiplex features live here. You keep more headroom than scope, so a standing person is easier to frame in one shot.
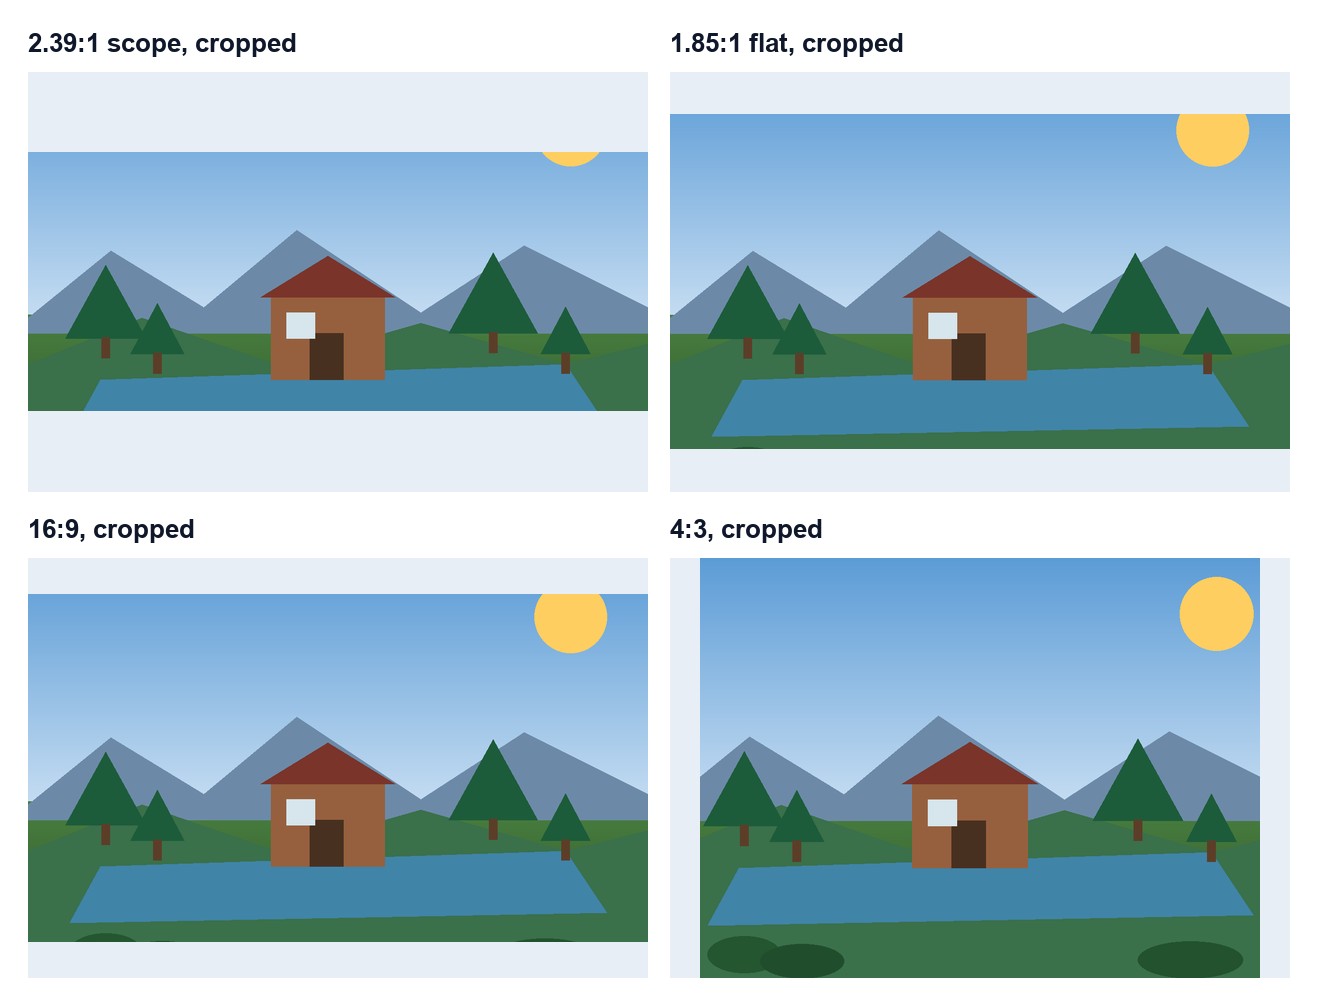
1.85:1 is close to 16:9 and easy to confuse with it. They are different files. A 1200-pixel-wide crop is 649 pixels tall at 1.85:1 and 675 pixels tall at 16:9. That gap is small on a phone and obvious when you place both stills in the same layout.
16:9
16:9 is 1.78:1. It is the HDTV shape, the YouTube player, and the usual phone-video frame. Use it when the still has to drop into a video timeline, a slide deck, or a channel banner’s safe picture without a second scale step.
If you already have a 2.39 still and the destination is a 16:9 video, Bars puts the wide picture inside that video frame and fills the gap above and below. That is the letterbox people remember from a scope movie on a television. Crop would instead cut the left and right of the wide picture until it fits 16:9.
4:3
4:3 is 1.33:1. Classic television and many compact cameras used it. It is the tallest ratio on the tool, so it keeps sky, full bodies, and the height of a room. Academy ratio, the older film gate, is about 1.37:1. 4:3 is the practical neighbor the tool offers.
On the 3:2 sample, 4:3 is taller than the source relative to its width, so a crop trims the left and right and keeps the sun and the shrubs. Bars going the other way, from a wide photo toward 4:3, adds bands on the top and bottom.
When to use bars, and when to crop
Bars keeps every pixel and grows the canvas until the ratio matches. Crop keeps the largest area that already has that ratio, and the rest of the photo is gone.
Which edge gets the empty space depends on the photo you brought in.
- The photo is narrower than the target. A 4:3, 3:2, or 16:9 picture heading to 2.39:1 is in this group. Bars adds bands on the left and right. The new file is wider. Crop removes the top and bottom.
- The photo is wider than the target. A scope still heading into 16:9, or a panorama heading into 4:3, is in this group. Bars adds bands on the top and bottom. Crop removes the left and right.
Position runs from 0 to 100. 50 is centered. The labels switch to match the axis that can move: Top and Bottom, or Left and Right. At 0 the frame sits on the start edge. At 100 it sits on the far edge. If the photo already matches the ratio, the slider has nowhere to go and stays disabled.
Bar color applies only in Bars mode. The default is black, which reads as a film frame. A brand color works for a title card. Crop ignores the color, because there is no empty band to paint.
The Output line under the controls shows the pixel size before you commit, for example 1912 × 800. The preview is scaled so the page stays quick. Apply Frame writes the full-size result. If one side would pass 8192 pixels, the tool scales that frame down so the browser can still draw it. Download offers PNG, JPG, or WebP.

How to frame a photo with Cinematic Aspect
Upload, pick a ratio, pick Bars or Crop, slide Position if the subject sits off center, set a bar color when you are using Bars, then click Apply Frame and download. The page is cinematic-aspect.html. No account and no install.
Step 1: Upload the photo
Drag a file onto the drop zone, click it, or paste with Ctrl+V. JPG, PNG, WebP, and other common images work. Stay under 20MB. A photo with the subject away from the extreme edges gives you more room to slide Position later.
Step 2: Choose a ratio
The ratio buttons are 2.39:1, 2.00:1, 1.85:1, 16:9, and 4:3. The preview updates as soon as you click. Read the Output line. That number is the file you will download, in pixels.
Step 3: Choose Bars or Crop
Choose Bars when a corner logo, a person at the edge, or the full background has to survive. Choose Crop when the delivered file should be the film ratio itself, with no empty margin, for a thumbnail, a print, or a layout that will add its own frame.
Step 4: Set Position
Leave it at 50 for a centered frame. Drag toward the start label to keep more of the top or the left. Drag toward the far label to keep more of the bottom or the right. Watch the preview. A face or a horizon that touches the crop line at 50 usually looks better a few points off center.
Step 5: Set the bar color
In Bars mode, click Bar color and pick a swatch. Black matches a cinema frame. White matches a gallery mat. Any other color is a design choice for a title card. Switching to Crop hides this control.
Step 6: Apply Frame and download
Click Apply Frame. The result panel shows the full-size image. Choose PNG, JPG, or WebP next to Download. Changing the format after a result is showing renders the file again. Refreshing the page clears the photo, so download before you leave.
Tip: Decide the destination before the ratio. A YouTube cover wants 16:9. A trailer still wants a 2.39 crop. A frame that must not lose the corners wants Bars.
Picking a ratio for the job
Match the ratio to the place the picture will be seen. A theatrical still, a streaming poster, a YouTube frame, and a classic television crop are different files.
2.39:1 crop — trailer stills, wide landscapes, and title sequences where the horizon is the point. Check hair and feet before you download.
2.00:1 — streaming key art and episode stills. Wide enough to feel like a show, tall enough for a two-shot.
1.85:1 — feature-film stills and dialogue scenes that still need headroom.
16:9 — YouTube thumbnails that fill the player, slides, and phone-video covers.
4:3 — a retro television frame, a full-body portrait, or a room that needs its ceiling and floor.
Mistakes that make the frame look wrong
The usual miss is Bars when you wanted the picture itself to become wide, or a centered crop that slices a face. Both show up in the preview before you download.
- Bars on a 4:3 or 3:2 photo, aimed at 2.39:1, produces side bands. The top-and-bottom stripes people remember from a television appear when a wide picture is placed into a taller frame, as in the 16:9 example above.
- Crop at Position 50 cuts through a head when the person stands in the upper third. Move the slider, then click Apply Frame again. A setting change clears the previous result so you do not download the old frame.
- Exporting bars and then dropping that file into an editor that letterboxes again shrinks the picture inside a second black frame. If the editor will add the bars, export a crop.
- 16:9 and 1.85:1 look alike in a small preview. Trust the Output line.
What to adjust after the frame
The ratio is the cut. Color is a separate pass. Lock the frame first so you do not grade pixels you are about to throw away.
After the download, Adjust Photo Tone can warm or cool the still and shape highlights, shadows, whites, and blacks. If the still should feel like an old digicam rather than a cinema frame, the CCD Style filter adds grain, a warm cast, and a soft vignette. Do that on the framed file, or on a copy of the original if you still want the uncropped photo.
Put a photo into 2.39:1, 1.85:1, or 16:9 with bars or a crop.
Open Cinematic Aspect