How to Turn Photos Into Glitch Art Online
Glitch art turns digital “errors”—RGB channel splits, scan lines, corrupted bands, and VHS noise—into deliberate style. If you want to know how to make glitch art from a photo without After Effects or Photoshop plugins, this guide walks through ROCKIMG's free Glitch Effect tool: three base glitch types, an intensity slider, and three optional overlays—all processed locally in your browser.
Published on: June 15, 2026
Want to glitch your own photo right now?
Open the Glitch Effect ToolWhy turn photos into glitch art?
People search for a glitch filter or photo glitch effect for more than novelty. Common use cases include:
- Social posts and stories: glitch aesthetics fit TikTok, Instagram, and cyberpunk mood boards.
- Music and event graphics: album covers, flyers, and DJ visuals often lean on distorted digital texture.
- Creative portraits: RGB shift adds edgy color fringing without heavy manual masking.
- Retro tech vibes: scan lines and VHS stripes evoke CRT monitors and worn tape.
- Privacy-friendly editing: ROCKIMG processes images in your browser—photos are not uploaded to a server.
What defines glitch art?
Authentic glitch art usually layers several “broken signal” traits:
- RGB channel separation — red and blue shift sideways, leaving cyan/magenta ghosts
- Horizontal banding — rows of pixels slide or repeat like corrupted data
- Scan lines — alternating bright/dark CRT rows across the frame
- Static noise — random speckles over the image
- VHS tracking lines — bright horizontal stripes with occasional color swap
- Random blocks — rectangular patches copied from elsewhere in the frame
The Glitch Effect tool covers all of these in one page, so you can experiment with combinations instead of stacking multiple apps.
How to make glitch art online (step by step)
Full workflow on glitch-effect.html—no install, no account.
Step 1: Upload your photo
Drag and drop an image onto the upload area, or click to choose a file. JPG, PNG, and WebP work well. High-contrast photos—neon signs, sharp silhouettes, flash portraits—usually produce stronger glitch reads than flat, low-contrast shots.
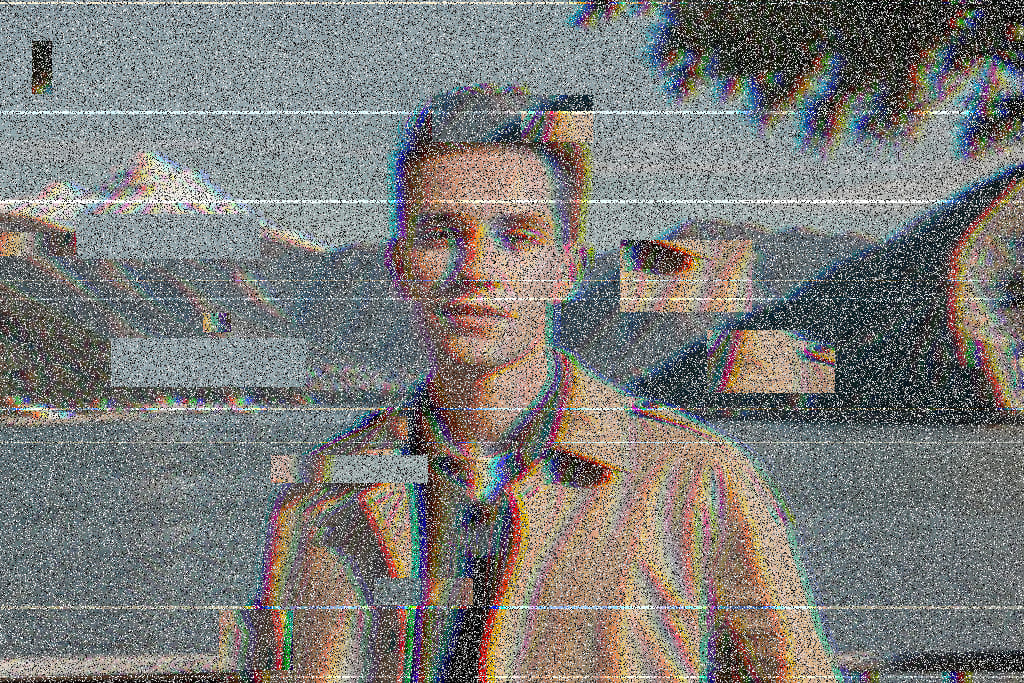
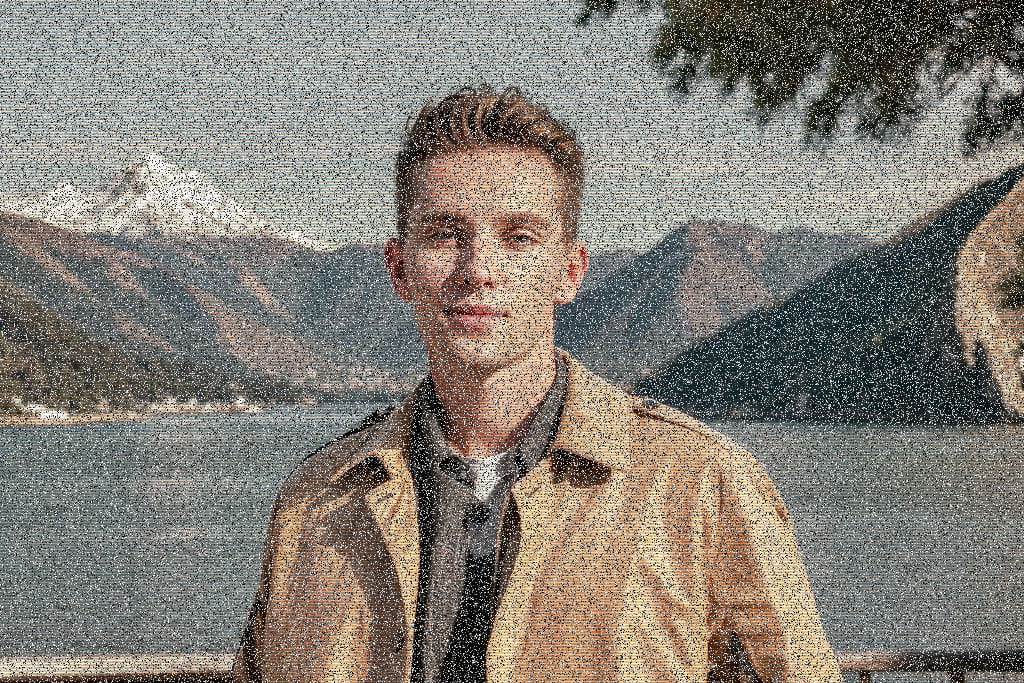
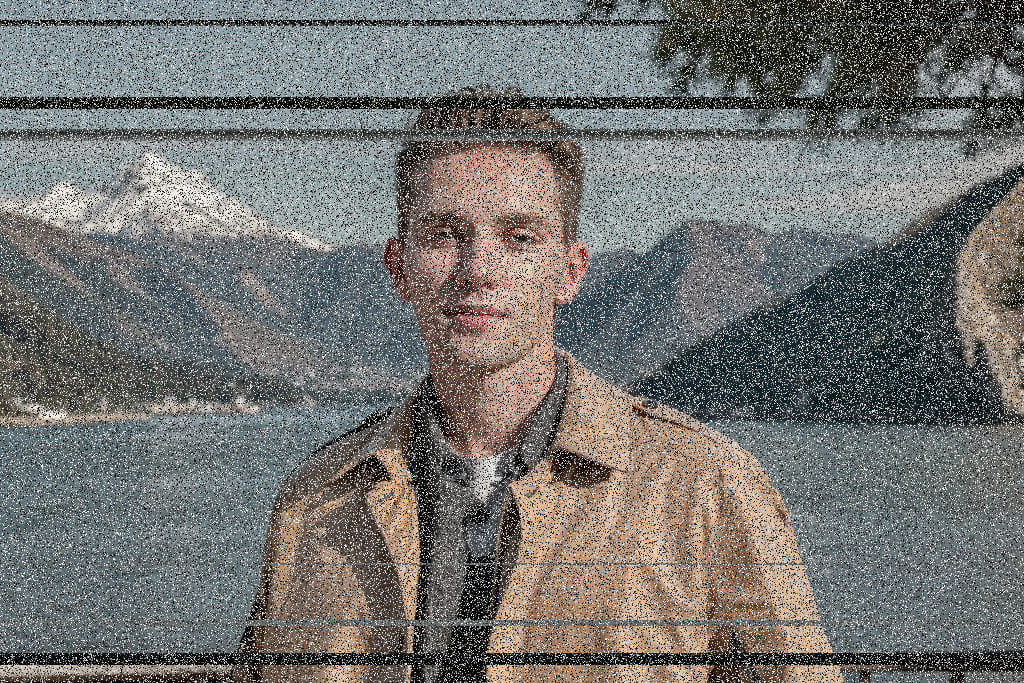
Step 2: Choose a glitch type
Pick one of three base styles:
- RGB Shift: separates color channels horizontally—the classic cyan/magenta “chromatic glitch” look.
- Scan Lines: adds alternating bright and dark horizontal rows like an old CRT display.
- Corruption: shifts horizontal bands sideways to mimic damaged or interrupted data.
Step 3: Set glitch intensity
Use the Glitch Intensity slider (0–100%). Lower values keep the photo recognizable; higher values push toward abstract distortion. At maximum RGB shift, channels can move up to about 10 pixels; corruption adds more band offsets, and noise density scales with intensity.
Step 4: Toggle special effects (optional)
Stack up to three overlays on top of the base glitch type:
- Add Noise: random grayscale speckles—great for grit and analog static.
- Random Blocks: copies rectangular patches from random locations—adds chaotic “digital tearing.”
- VHS Lines: bright horizontal stripes, sometimes with red/blue swap—classic tape tracking artifacts.
Add Noise is checked by default. Turn on blocks or VHS when you want a harsher, more chaotic result.
Step 5: Apply and download
Click Apply Glitch Effect, preview the result on the right, then download when you are happy. Re-run with different settings—the tool always starts from your uploaded original.
Tip: Change one control at a time. If the image feels too messy, lower intensity or disable Random Blocks first; if it feels too clean, add VHS Lines or bump intensity by 10–15%.
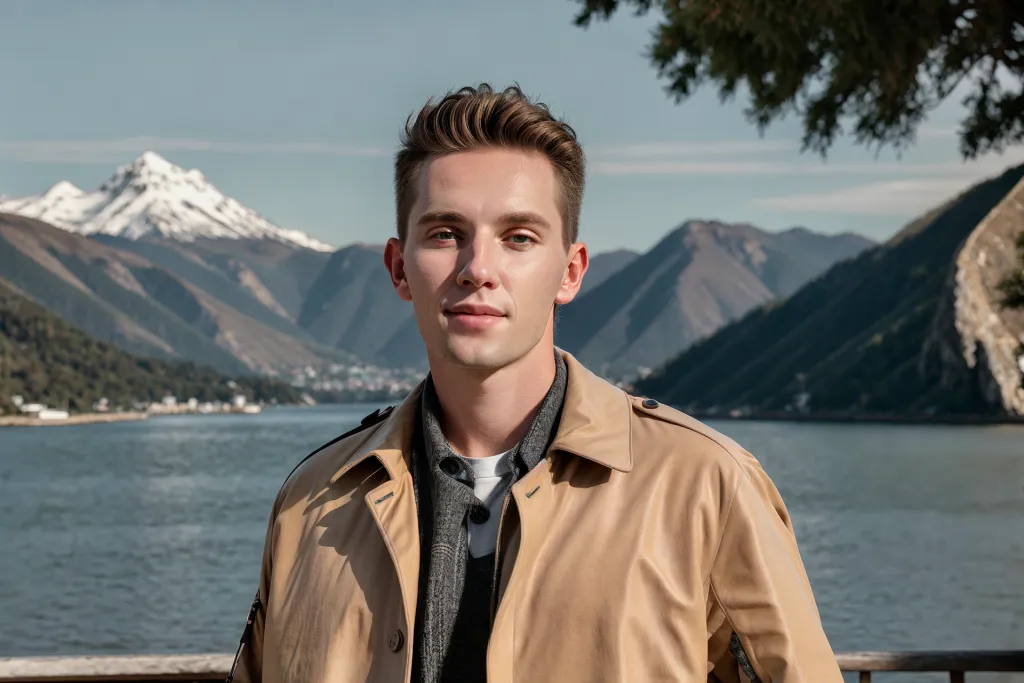
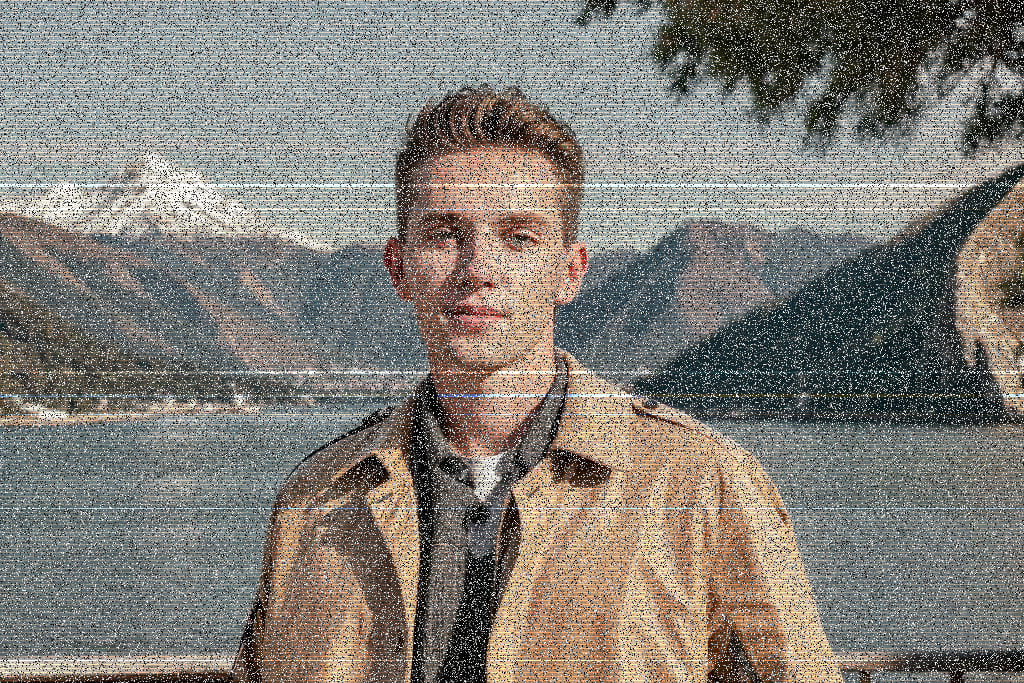
Glitch type examples
Each example below uses the same portrait with a different base glitch type.

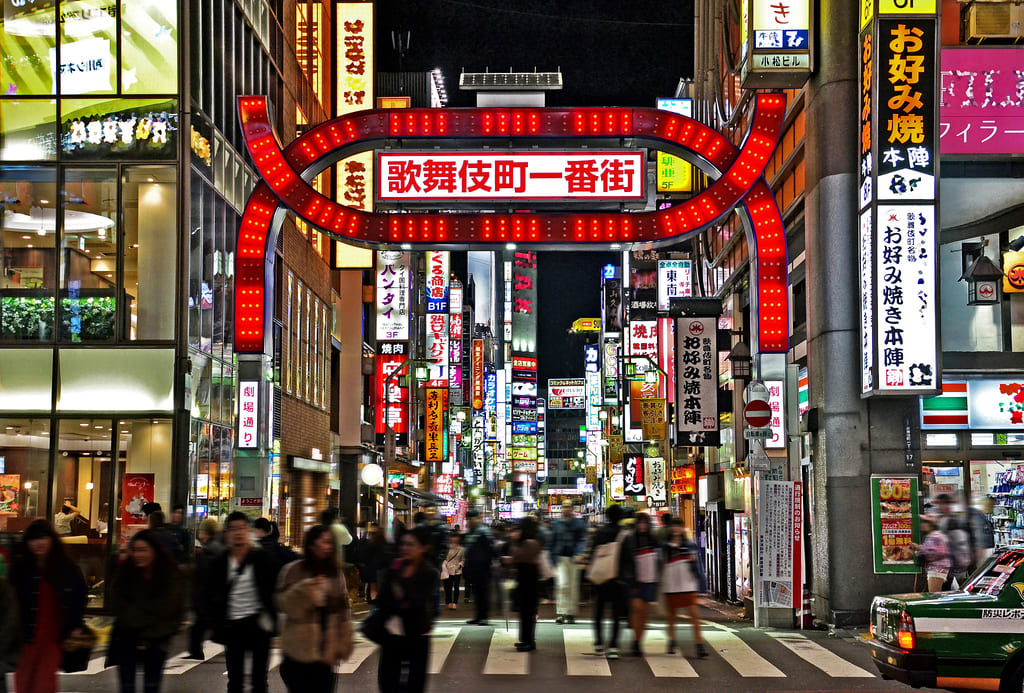
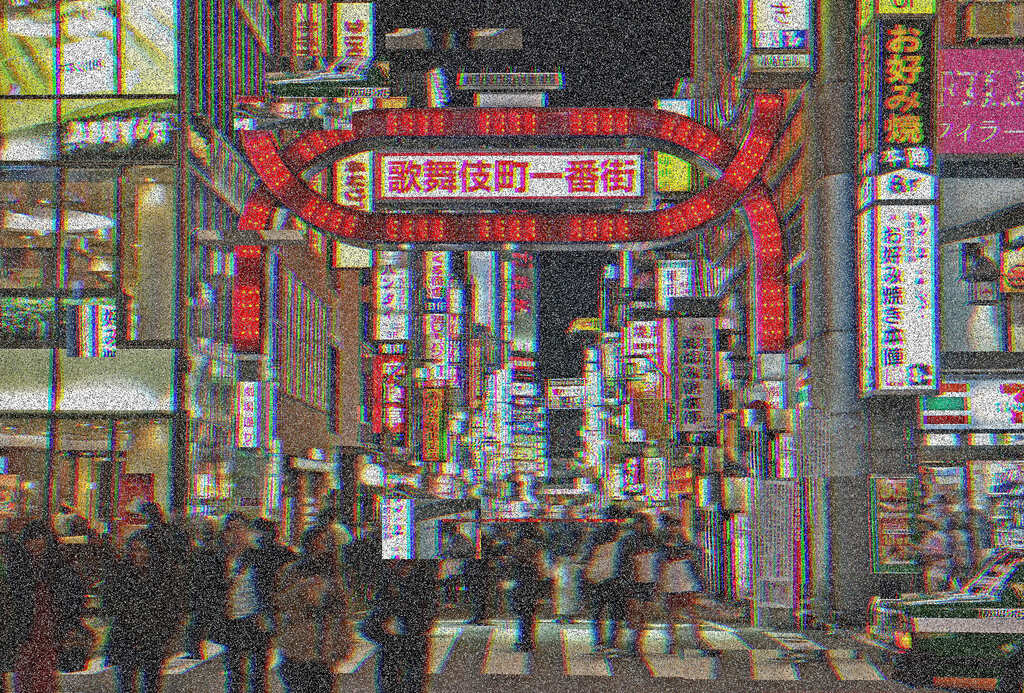
Urban and city glitch examples
Cityscapes, neon streets, and night skylines are ideal glitch subjects—bright signs and hard edges make RGB Shift and Random Blocks pop. The pair below shows a high-contrast urban photo before and after glitch processing.
Ready-made glitch recipes
Subtle social glitch — RGB Shift at 35–45% with noise only. Enough edge for stories without obscuring the subject.
Cyberpunk poster — RGB Shift at 75–85% with all three special effects on. Matches neon cityscapes and dystopian captions.
Neon cityscape — RGB Shift at 65–75% with noise and random blocks on, VHS off. Works especially well on night streets and skylines with bright signs.
CRT / vaporwave — Scan Lines at 55–70% with VHS Lines and noise, blocks off. Softer than full corruption, strong retro screen feel.
Broken file aesthetic — Corruption at 70–85% with noise; add Random Blocks for extra chaos.
Tips for the best glitch art results
- Start around 50% intensity and adjust—many strong glitch pieces sit between 45% and 75%, not always at maximum.
- Portraits with clear edges respond well to RGB Shift; busy textures and neon cityscapes suit Corruption and Random Blocks too.
- Stacking all special effects at high intensity can overwhelm small mobile thumbnails—preview at phone size before posting.
- Keep your original file; glitch is destructive and hard to undo after export.
- For film grain without channel split, try Add Noise on a separate copy.
- For dreamy retro digicam instead of harsh glitch, see CCD Style Filter or Low Quality Image Maker.
Turn any photo into glitch art—free, in your browser.
Open the Glitch Effect Tool