How to Add Noise to an Image: Noise Texture & Gaussian Noise
Learning how to add noise to an image is useful when you want film-style grain, subtle noise texture, or a less “clinical” digital look. This guide explains Gaussian noise, how it differs from other patterns, and how to add noise to an image with ROCKIMG’s free Add Noise tool in your browser.
Published on: April 20, 2026
Open Add Noise and try Gaussian noise on your photo.
Try Add NoiseWhy add noise to an image?
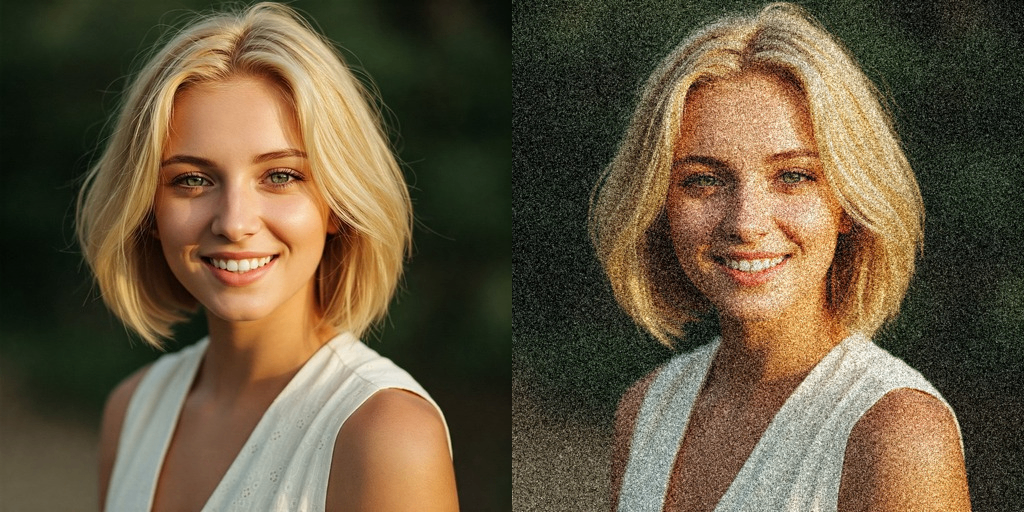
Pristine digital photos can feel flat or overly smooth. When you add noise to an image, you reintroduce fine variation that mimics film grain, paper texture, or sensor character. Designers and photographers also use noise texture to unify composites, age a mockup, or hide banding in gradients. The goal is usually believable grain—not random static—so strength and grain size matter.
What is noise texture?
Noise texture is the visible pattern created by random (or pseudo-random) pixel variation across an image. At low strength it reads as soft grain; at high strength it can dominate the picture. Good noise texture preserves the underlying photo: you still recognize edges and color, but surfaces feel less “plastic.” Pairing noise with appropriate resolution (and grain size) keeps the effect intentional rather than accidental.
Gaussian noise in plain terms
Gaussian noise adds pixel-level variation that follows a bell-shaped (normal) distribution. Visually, it often looks like fine, even grain—similar to what many people expect from “camera noise” or light film grain. That is why Gaussian noise is a common first choice when you add noise to an image for a natural look.
ROCKIMG’s Add Noise tool also supports other noise types—such as Salt & Pepper, Uniform, and Poisson—which produce different noise texture characters (speckles, even distribution, or shot-noise-like patterns). Experiment when you want a more stylized or gritty effect.
How to add noise to an image (step by step)
Here is how to add noise to an image with the online workflow on add-noise.html:
Step 1: Upload your image
Drag and drop a file or click to upload. You can also start from a sample image if you want to preview the effect quickly.
Step 2: Choose a noise type
Select Gaussian noise for classic fine grain, or try other modes for a different noise texture.
Step 3: Adjust intensity and grain
Use noise intensity to control how strong the effect is. Tune grain size so the grain matches your image scale—large grain reads more retro or coarse; small grain feels closer to subtle film grain. Optional color controls can tint the noise for a warmer or cooler look.
Step 4: Apply and download
Click Apply Noise, review the preview, then download when the look matches your goal.
Tip: Start with low intensity and increase gradually. It is easier to add noise to an image in small steps than to remove heavy grain afterward.
Best practices
- Match noise texture to output size—what looks good full-screen may look harsh as a small thumbnail.
- For portraits, favor lighter settings so skin does not look overly gritty unless that is the creative intent.
- When simulating film, combine mild Gaussian noise with sensible grain size rather than maximum intensity.
- Keep a non-destructive mindset: keep the original file before you add noise to an image for production use.
Conclusion
Whether you need Gaussian noise for fine grain or another mode for a bolder noise texture, knowing how to add noise to an image helps you control mood and style. Use ROCKIMG Add Noise to add noise to an image online, adjust type and strength, and download the result—without installing desktop software.
Add grain and noise texture in your browser—free.
Open Add Noise